
internal:proddocs:3410
This is an old revision of the document!
Warning: Undefined array key 1 in /data/docs.osukl.com/public_html/lib/plugins/note/syntax.php on line 103
Warning: Undefined array key 1 in /data/docs.osukl.com/public_html/lib/plugins/note/syntax.php on line 103
Warning: Undefined array key 1 in /data/docs.osukl.com/public_html/lib/plugins/note/syntax.php on line 103
Warning: Undefined array key 1 in /data/docs.osukl.com/public_html/lib/plugins/note/syntax.php on line 103
Warning: Undefined array key 1 in /data/docs.osukl.com/public_html/lib/plugins/note/syntax.php on line 103
3410 Build Instruction
The 3410 PCB assembly contains components that are sensitive to electrostatic discharge (ESD) – please make sure you are wearing your wrist strap when handling.

Programming
Connect PCB and set voltage to 12.30 then Select Atmel studio, see pics below


Select device programming and apply see pic below

Select required fuses (see pics below)


Ensure LOW.CKDIV8 is unticked see pic below.

Ensure HIGH.BOOTRST is ticked see pic below

Select the last option on the list see pic below

Select Memories and program, see pic below

To ensure the PCB is programmed correctly, select monex and get Prodinfo, see pic below

Test procedure
Test equipment required
500 Amp shunt/ 3410 test fixture, DC current transformer, Monex
You Will require 2 NMEA connections
With the power off, Fit 3410 in place, wire unit as per order below,
Plug in NMEA connector, Plug in power wires black (1) and red (2). (This is power from the NMEA, not the Power Supply, use grey cable)
Please see pic below.
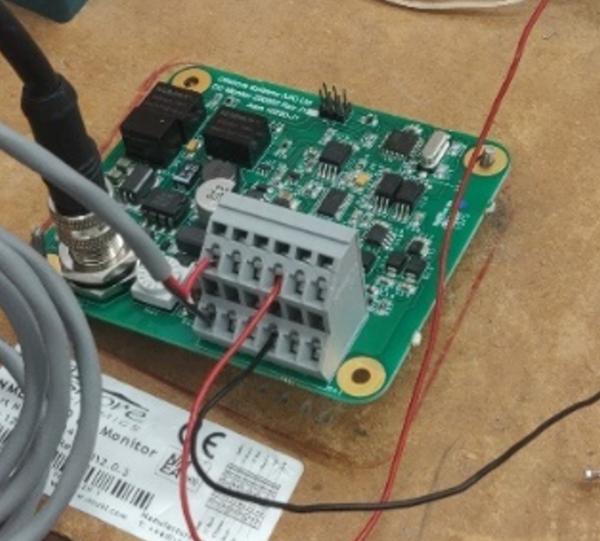 Connect red (8) and black (7) shunt wires as per label see pics below
 Connect red (8) and black (7) shunt wires as per label see pics below
internal/proddocs/3410.1649230398.txt.gz · Last modified: 2023/07/12 14:11 (external edit)